With the ever evolving landscape of the internet, it's becoming more important than ever to protect yourself and your loved ones from those who want to take advantage of you.
Advertisements are a pain. At best, they're a nuisance. At worst, they can be malicious.
Malvertising, or Malicious Advertising, is the act of hiding malware in Ads. Since Advertisements are in most cases non-consensual (especially for free websites), they can be used as vectors to deploy viruses and other nasty software to people's computers. A report by AdSecure highlights significant increases in various malvertising techniques in the first half of 2023 alone, with phishing URLs leading the charge with a 140.7% increase. Ads can also track you across websites using cookies, which can be a breach of privacy to a lot of people.
One of the best and most effective way to block advertisements is getting an Adblocker for your web browser. These are usually offered as extensions or plugins that you can download, often at no cost. For example, uBlock Origin and Adblock Plus are excellent applications that can block 90% of Ads that show up on your browser. Some websites can detect if you are using an Adblocker however and will not show you content unless you disable it, so you may try TamperMonkey to block the JavaScript that detects your Adblocker.
Even though these solutions are excellent, there are some drawbacks to them:
So, what now? What else can you do to maximize the Ads you block and browse the web as safe as possible? Well, one way to accomplish this is a DNS Adblocker. In this guide, I'm going to talk about how to set up one of these bad boys, and why every household should be doing this in the modern age.
In order to explain what a DNS Ad blocker is, we first need to explain DNS, and what role it provides when browsing the web.
DNS stands for "Domain Name Service", and plays a pivotal role in how you navigate the internet. It involves translation a human-readable domain name to a machine-readable IP address of the server that will give you the resources associated with that name.
Take google.com. Google.com the domain name is easy to understand by us humans, but your computer is not going to understand this, at least not directly. Your computer needs to send a DNS request to a server that knows what the IP address is for that domain name. That server will tell your computer this IP address, which your computer can then use to access the web page you want. The incredible thing about this is that this whole process takes less than a few seconds! 🤯, isn't technology neat?
What I described above is the gist of how DNS works, but in reality, it's a lot more complicated than this, with multiple DNS server types (forwarder vs. resolver), caching with time to live packets, chain of trust with DNSSEC, and all other security goodies to protect against attackers. Here are some resources if you wish to find out more about this protocol:
Now that we've explained how DNS works, we can explain its role in delivering advertisements. Most websites that serve Ads retrieve them by sending requests to the domain name of those advertisements. Your computer then takes these domain names and returns the IP address of those advertisements. This happens once a webpage is loaded. You basically get betrayed, by your computer 😔.
But what if you can block those DNS requests from getting through? Well, your computer won't be able to resolve them, meaning they won't even load on your webpage. If they don't load on your webpage, then your Ad blocker doesn't need to block as many ads, so it's a win-win situation for everyone! I'm going to cut to the chase and say one of the most popular ways to block DNS requests over a network is PiHole, but you can also use AdGuard and PFBlockerNG if you are using PFSense. If you are committed, I'll throw in how to do IP level blocking at the end!
PiHole was created by Jacob Salmela as a personal project to block ads on his home network. He wanted a solution that would work for all devices connected to his network without needing to install ad-blocking software on each device. As it's said in the name, PiHole is meant to be used on a Raspberry Pi, but since it's an application, not an operating system, it can be installed on literally any computer.
When starting out, I would recommend a Raspberry Pi (or a cheaper alternative), as a Raspberry Pi is fairly efficient and does not take up a lot of space. When I started by homelab, it was with a Raspberry Pi, so I highly recommend them! This guide assumes you have an internet connected Linux system with a static IP that you can access the command line from. There will be some extremely basic Linux commands in the beginning, but after that everything will be accessible from the web UI
PiHole is a DNS sinkhole. Imagine a bouncer at the club, with the club attendees being DNS requests on your network, and the bouncer being PiHole. PiHole will control which DNS requests go through, and which ones get turned down based on the AdBlock lists you tell it. I will expand on this later.
Head over to the PiHole GitHub to download PiHole using their automated installer:
curl -sSL https://install.pi-hole.net | bash
This will auto install and configure PiHole as a service, so it will auto boot up if your machine shuts down or needs to restart for any reason, PiHole will boot up automatically with no downtime. Neat!
After installation, you should see a password in the terminal output. In order to manage PiHole, you need to use this password to login to the web interface:
You can access this interface by typing in the IP address of the machine running PiHole. For most Linux installs, you can use the following command:
user@pihole-machine:~$ hostname -I
10.24.5.51 ...
...
In my case, this is 10.24.5.51, so I would need to type in http://10.24.5.51/ into my web browser to get the PiHole page above.
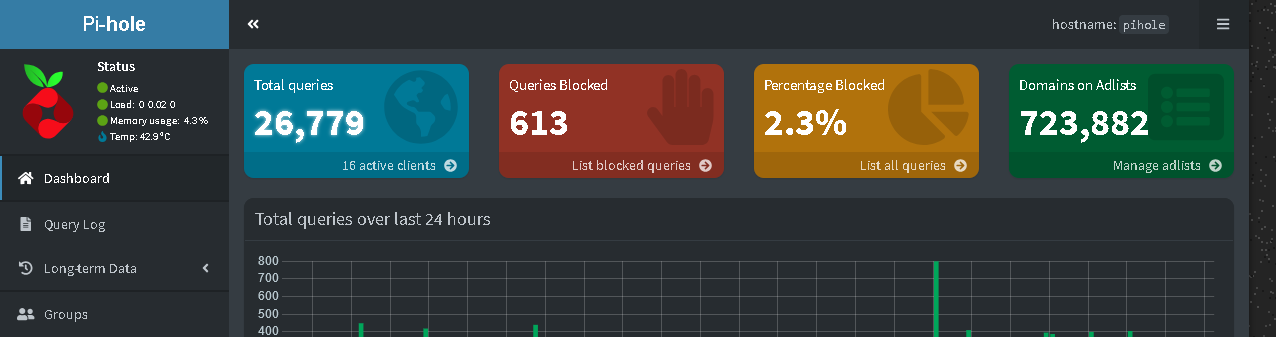
Once you log into the page, you should see the landing page for PiHole, which displays fancy statistics such as number of total DNS requests, how many of them were blocked, your hostname and system information:
Now that you have logged into your PiHole instance, go to Settings -> DNS. You will be met with a few options:
PiHole by default is a DNS forwarder, a term I have touched on earlier, albeit briefly. A DNS forwarder is a type of DNS server that will forward DNS requests to another DNS server (another forwarder or typically resolver) that will then process the request. If the DNS request yields data, PiHole will cache this data, so subsequent requests of the same domain name are faster, then deliver this data back to the machine on your network that requested it.
You can select what Upstream DNS server to use here. I would recommend either Google or Cloudflare. You can also specify a custom DNS resolver on the column to the right. Later on in this guide, we will go over how to set up your own recursive DNS server on the same system, and why you may want to do this.
This defines how your PiHole service is accessible. By default, only devices in the same subnet as your Linux machine hosting PiHole may access it for DNS resolution. For example, if my PiHole is at address 10.24.5.51, then the only machines that can be allowed to access PiHole can be 10.24.5.1 - 10.24.5.100.
In situations where you want machines on a different subnet accessing your PiHole service, you can select the 3 options below, depending on your use cases:
eXXXX: This responds to DNS requests arriving at the specified interface, but will technically listen on all interfaceseXXXX: This responds to DNS requests arriving at the specified interface, and will only listen on that interface. This is useful for if you have other services listening on the same port DNS listens on, which isn't commonThese are some non trivial settings that you probably don't need to worry about, but I will explain them in case you have a use case that fits with them:
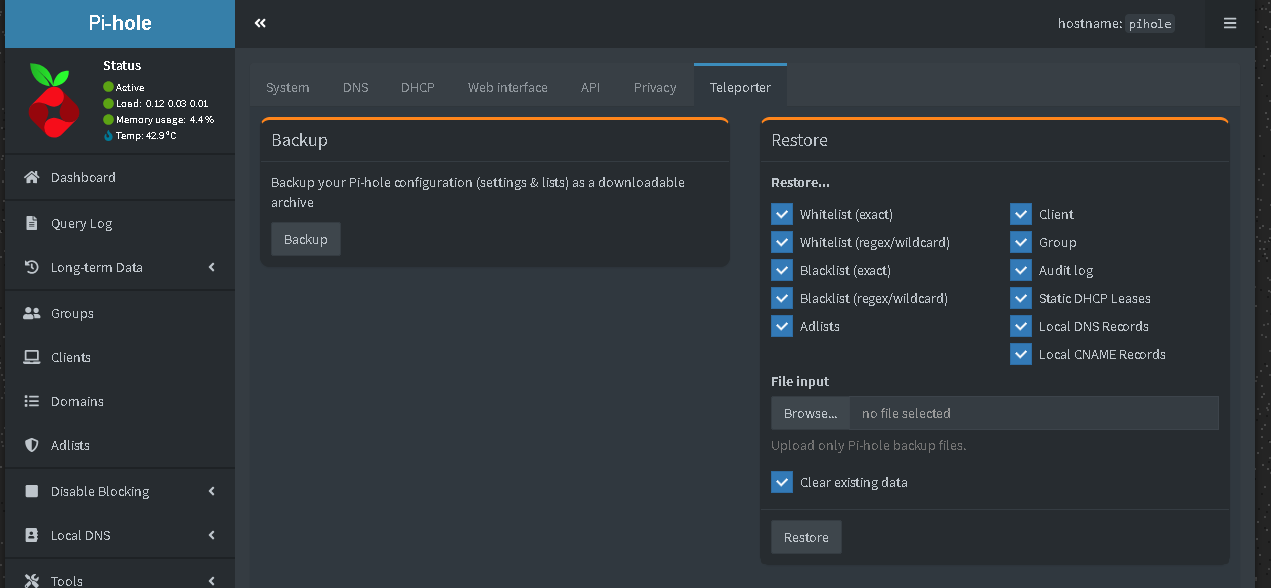
The second page you will need to look at is Settings -> Teleporter. In this page, you will be able to back up/restore your PiHole configuration:
Configuring Ad blocking in PiHole is far easier than the previous sections. Simply click on the Adlists tab on the left-hand side to see what Ad blockers you are currently working with. There is one default ad blocker that should be enabled:
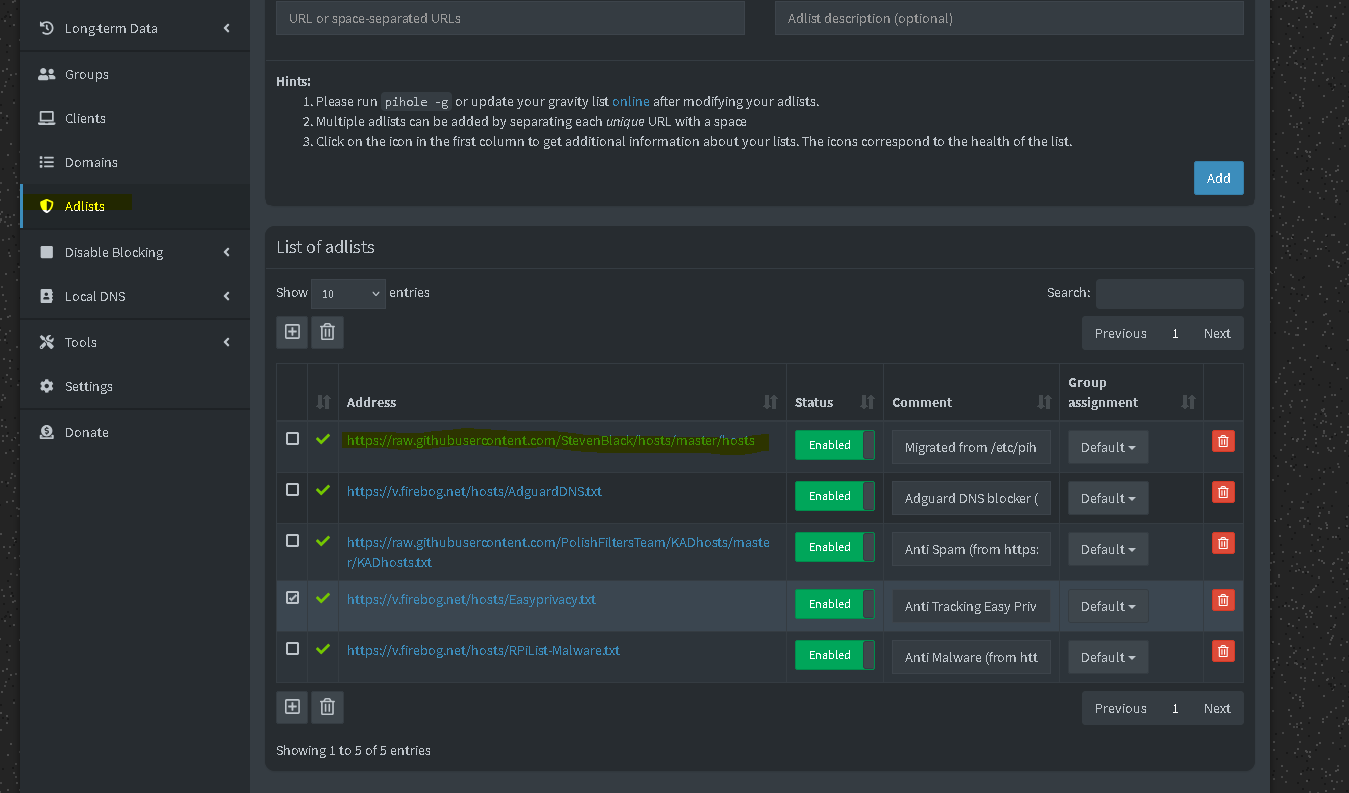
If you want to add new blocking lists, you can add the URL to those lists along with a short description, as shown in the top of the image.
Note: Be careful with the block lists, as some of them have high false positive rates that could block you from accessing legitimate data on the internet. I would recommend adding 2 or 3 extra block lists from the following resources:
One of the cool features PiHole has is selective Ad blocking. You can add client machines that use your PiHole services for DNS into a table, and assign them to a group. Then, any Ad list you have you can apply it only to that group. Client machines in different groups will not be affected that Adlist. You can use this to group together children's devices and enforce parental search for example.
Now, when configuring Ad blocking, this is network wide as opposed to having an Adblocker on your machine, so your machine would never even get the chance to render the Ads on your screen. Every DNS request your machine sends goes through your PiHole service, and is filtered against all the configured Adblock lists. Only legitimate requests go through and are resolved, and this happens over the course of a second at most 🤯! Isn't that amazing?
At this point, you are largely done configuring PiHole, and can point your devices to use it as their DNS server. There are a lot of guides online on how to do this for any device you have. Also, depending on how your internet is set up, you can use your router to force devices to use your DNS server, and block DNS requests anywhere else. This can be done on pfSense or OPNSense, and my plan is to get a guide up on how to do this some point in the future.
Earlier on I mentioned that you can configure your own custom DNS server that PiHole can forward to. In order to explain why you may want to do this, I need to explain the side effects of using a DNS forwarder.
When PiHole forwards DNS requests, it passes them along to an upstream server, which logs the request from your PiHole instance, which is a request a device on your network made. Whether that server is authoritative (it has the IP address mapping) or not, that doesn't matter, as PiHole will forward the DNS request to that server regardless and have it do the heavy lifting of figuring out which IP address corresponds with the domain name.
The issue with this is that the upstream server now has the DNS request you want to make. For example, if your PiHole forwards to Google's DNS, they're known for logging user data, so this poses a privacy concern for some people, because if you visit let's say Amazon or Wikipedia, Google will know the sites you visit.
This will require you to go back in to the Linux Terminal, specifically the machine you are hosting PiHole with. This section will be a bit more involved and will require text editing. The complete guide can be found in the PiHole Docs:
sudo apt install unbound./etc/unbound/unbound.conf.d/pi-hole.conf. Create the file if it does not exist:server:
# If no logfile is specified, syslog is used
# logfile: "/var/log/unbound/unbound.log"
verbosity: 0
interface: 127.0.0.1
port: 5335
do-ip4: yes
do-udp: yes
do-tcp: yes
# May be set to no if you don't have IPv6 connectivity
do-ip6: yes
# You want to leave this to no unless you have *native* IPv6. With 6to4 and
# Terredo tunnels your web browser should favor IPv4 for the same reasons
prefer-ip6: no
# Use this only when you downloaded the list of primary root servers!
# If you use the default dns-root-data package, unbound will find it automatically
#root-hints: "/var/lib/unbound/root.hints"
# Trust glue only if it is within the server's authority
harden-glue: yes
# Require DNSSEC data for trust-anchored zones, if such data is absent, the zone becomes BOGUS
harden-dnssec-stripped: yes
# Don't use Capitalization randomization as it known to cause DNSSEC issues sometimes
# see https://discourse.pi-hole.net/t/unbound-stubby-or-dnscrypt-proxy/9378 for further details
use-caps-for-id: no
# Reduce EDNS reassembly buffer size.
# IP fragmentation is unreliable on the Internet today, and can cause
# transmission failures when large DNS messages are sent via UDP. Even
# when fragmentation does work, it may not be secure; it is theoretically
# possible to spoof parts of a fragmented DNS message, without easy
# detection at the receiving end. Recently, there was an excellent study
# >>> Defragmenting DNS - Determining the optimal maximum UDP response size for DNS <<<
# by Axel Koolhaas, and Tjeerd Slokker (https://indico.dns-oarc.net/event/36/contributions/776/)
# in collaboration with NLnet Labs explored DNS using real world data from the
# the RIPE Atlas probes and the researchers suggested different values for
# IPv4 and IPv6 and in different scenarios. They advise that servers should
# be configured to limit DNS messages sent over UDP to a size that will not
# trigger fragmentation on typical network links. DNS servers can switch
# from UDP to TCP when a DNS response is too big to fit in this limited
# buffer size. This value has also been suggested in DNS Flag Day 2020.
edns-buffer-size: 1232
# Perform prefetching of close to expired message cache entries
# This only applies to domains that have been frequently queried
prefetch: yes
# One thread should be sufficient, can be increased on beefy machines. In reality for most users running on small networks or on a single machine, it should be unnecessary to seek performance enhancement by increasing num-threads above 1.
num-threads: 1
# Ensure kernel buffer is large enough to not lose messages in traffic spikes
so-rcvbuf: 1m
# Ensure privacy of local IP ranges
private-address: 192.168.0.0/16
private-address: 169.254.0.0/16
private-address: 172.16.0.0/12
private-address: 10.0.0.0/8
private-address: fd00::/8
private-address: fe80::/10
# Ensure no reverse queries to non-public IP ranges (RFC6303 4.2)
private-address: 192.0.2.0/24
private-address: 198.51.100.0/24
private-address: 203.0.113.0/24
private-address: 255.255.255.255/32
private-address: 2001:db8::/32
sudo service unbound restartdig utility: dig pi-hole.net @127.0.0.1 -p 5335127.0.0.1#5335, then click Save & Apply.What unbound does, is that it will contact the DNS server that is authoritative for your request, basically the DNS server that holds the IP address for your request. For example, unbound will try to find the authoritative server for the root domain .us in https://site.cpneppal.us, then it goes to the authoritative server for cpneppal.us, then it will go to the authoritative server for site.cpneppal.us and get the IP address. This bypasses Google or Cloudflare DNS (well, my domain name is on Cloudflare, but that's besides the point!) because the domain is not on those servers. In other words, Google will only know about the Google sites you visit, and nothing else, pretty sweet!